Tuesday, June 28, 2011

Fun at the Lake with Legos.

At the lake, we swim, we eat and we fish. The kids fished off the dock all week long. Lucky for us, there are tons of Brim chomping at the bit to snag the soggy bread bait off their hooks, so the kids get instant gratification with a catch practically every time they drop their lines. We unhook them, name them and then throw them back with their friends.

I got inspired by a photo hanging in the cabin by Lorri Honeycutt. Her slice of life portraits are so fun, I thought I'd try some myself with Jackson's Legos and enlisted the help of my friend Erich to catch "the big one" for these pictures. Thanks Erich! Great catch!


Jackson built this Pirate ship from scratch and wanted me to put it on my "Bwog". Pretty cool!

I'm sharing this post with my friends at Funky Polka Dot Giraffe.

Monday, June 27, 2011

Lake Staple— Hamburger Cupcakes and Sweet Tomato BBQ Sliders!

I picked up these cute hamburger cupcakes at Target. They just scream summer!


Got this yummy recipe for Sweet Tomato BBQ Sliders here. They were delish and easy to whip up!

One night at the Lake my friend, Shona and I made about 40 of these cute picnic themed party flags. All you need is some picnic themed fabric or paper, scissors, toothpicks and glue! As you can see from the pics, we used them a lot! 


Let's hear it for Summer!

We've been having lots of fun so far this summer! 

First a trip to the mountains.
Balsam, NC
Then a week at the lake.  
Ocala National Forest, Ocala, FL


Sweet summer. I love ya!

Can't wait to share our adventures!

Tuesday, June 21, 2011

Cool Critter Birthday Collection— unveiled!

Just finished fleshing out my Cool Critter Birthday Collection. I designed the invite for a customer a few weeks ago. You can see it here. Thought I'd share the rest of the Collection with you. If you have any ideas of things I can add to the collection, I'm all ears! And as always, thanks for taking a peek:)
11"x17" The Birthday Party Welcome Sign.

 2" Party Circles for Cupcake Toppers, Stickers, Thank You Card Stickers, you name it!

Buffet Labels and Stickers for Activities, games, crafts, etc.


 Party Favor Bag Tags

4x6 Fill-in-the-Blank Thank You Cards

Well, that's about it for now! I'm heading to the Lake for the rest of the week. Hope to have some time to relax and maybe make a few things. We'll see!

Saturday, June 11, 2011

"Here Comes the Bride" — Reusable Banner

Ok, so maybe I should be packing for our trip to the mountains tomorrow, but I just have to share this one last crafty thing before I go.
One of the teachers at my kids school asked me to make a wedding banner for her just like the one Martha Stewart has on her site. Martha's banner tutorial is here. I followed the sewing directions, but I hate iron-on projects because I inevitably mess it up and have to re-do it. Besides, I wanted to make the banner reusable after the wedding, so the teacher could use it in her class room next year too.

So I ditched the iron-on portion of the tutorial and came up with my own solution. I used PhotoTex adhesive fabric instead. This is the coolest stuff! I used it to make my "Love in a Cup" coffee wraps. The cool ostrich feather trim is also removable! Here's how I made the banner.

WHAT YOU'LL NEED:

  • Photo-Tex adhesive Ink-Jet fabric
  • Cool feather trim (I used Ostrich feather trim)
  • (5) Roach clips (spray painted white optional)
  • Safety pins (3-4)
  • your banner message (Download my alphabet template here)
  • an iron and ironing board (to iron the banner material)
  • scissors
  • (2) pieces of 15"x26" woven fabric or linen
  • straight pins
  • chalk fabric pencil (I used grey so it shows up on the white material)
  • 19" long wooden dowel (1/4" in diameter)
  • Sewing machine and sewing supplies

HOW TO:
The reusable Letters— download and print the PDF alphabet on Photo-Tex fabric from your Ink-Jet printer and cut ou your message. Set the letters aside.
The banner— Follow the instructions here EXCEPT for the Iron-on part!
Versatile Trim— To make the banner completely versatile, I made the feather trim removable so the teacher could replace the feathers with any theme she wants down the road. I attached the feather trim to the top of the banner using (3) safety pins. Stick the pin through the back seam and into the feather trim. Then stick the pin back through the banner and secure in the back. Pull the trim tight and pin at each end and in the center. For the trim at the bottom,  I painted metal roach clips (from the jewelry making section of the craft store) white and clipped the trim to the bottom of the banner. The feathers hide the clips.
Adhering the letters— Place your message on the banner and align. To help with letter placement and spacing, I placed an 18" ruler horizontally at the base of each line, peeled of the fabric backing and aligned each letter to the top of the ruler, making sure the words were centered on the banner.


Well, we're off to the mountains tomorrow! I'll keep you posted on our adventures.


Sharing this post with bedifferentactnatural.com.


Here's a peek at my newest Birthday Design— A Cool Critter Party

One of my customers recently emailed me asking if I could design an invitation for her other son's birthday— a Critter Party. She's going to have a company come to her home with all sorts of critters that the kids can hold, touch, play with, etc. Critters like a hedgehog, a snake (Python, actually), and a tarantula (eeks!). The family also has a pet hamster named "Uno"; a pet turtle named, "Frankin"; an ant farm; a love for Ladybugs; and a butterfly garden. Whew! She said all she was finding on Etsy were Bug, Bee and Insect themes— nothing on other animals. So I took a stab at a design and here it is...
 5"x7" Cool Critter Birthday Invite
(FRONT)

 5"x7" Cool Critter Birthday Invite
(BACK)

I'll be working on the rest of the Critter Collection next week and will share the whole Kit then. Now on to my next project— a Wedding Banner. Stay tuned!

BTW, I'm sharing this post with my friends at whipperberry.com, ffingerprintsonthefridge.com and reasonstoskipthehousework.blogspot.com.


Saturday, June 4, 2011

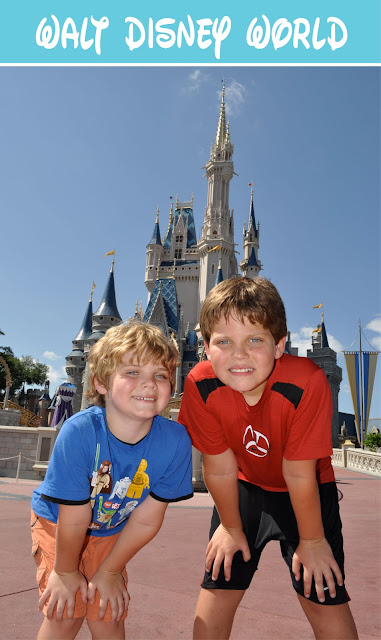
A Day at Disney World

We spent the day at Disney World today. It was Jackson's first time that he can remember. He's the perfect age now. I remember going to Disney as a kid. Everything was bigger than life, and so real to me. I think he felt the same way. We had so much fun.


After doing all we could at the Magic Kingdom, we went to Hollywood Studios to check out the Star Wars scene. At the very end of the day, I talked my family into doing the one thing I wanted to do— see the Disney Animation Show and go to the Animation Academy. It was 20 minutes of heaven for me. We learned how to draw the Toy Story Alien. As you can see, both my boys weren't very happy with their drawings— especially Jackson!
Poor little guy, I think he did a good job for his first try! He followed along every step of the Animator's directions and he didn't give up. I think it threw them off because there were no erasers on the pencils. I told Jackson to keep practicing and maybe one day HE could be an animator!

I grew up loving Disney and spent my afternoons drawing the characters. Thought I'd share some of my old Disney sketches from when I was a kid...
"Maleficant" The Villain from Sleeping Beauty
(by me, age 13)

101 Dalmatians
(by me, Age 13)

The evil Queen in Snow White
(by me, age 12)

The kids are wiped. Sounds cheesy, but it was a Magical day! 


LinkWithin

Related Posts with Thumbnails